As you know, I am part of Let’s Do It with Fondbites for the past three months. I joined the group to tune my cake decorating skills. Though friends and family members are excited about my cakes, I am not at all satisfied with the results. I want to make neat, perfect cakes with out any flaws. And I thought joining this group will really help me achieving that. And yes, it is so helping me. Every month Subhashini selects a theme for the cakes to be done and I think I am improving every month. I am not 100% perfect, may be 30-35% When I compare my first project to my third project, I can see the difference. I think even you can see my improvement. And also I have been learning new techniques each month. As a self taught baker and decorator, this group is providing me the best opportunity I can ever get.

Coming to this month’s challenge, it was Fairy Garden / Fairy Pot. We need to select a original fairy garden photo and replicate it in a cake. Before the start of June I didn’t know that fairy garden existed. And I researched a lot for more than a week. Finally I selected a pot and started working on the toppings. And disaster struck. I was feeling very low thinking about mom and I couldn’t proceed with the cake. I just stopped working for a few days and I even wrote to Subha that I will not be doing this month’s challenge. Seeing my condition hubby wanted me to do the cake just for diversion. After a lot of persuasion, I accepted and went for a simpler design. Ok, I thought it simple at first but I will tell you about all the problems I faced while making the cake.

The first day I started with the cake making. I made two vanilla sponges and while baking the chocolate sheet cake there was a power shut down for 10 minutes. Then power came back and the baking was done. When the other chocolate cake went inside, there was power for 20 minutes and then again a power shut down. I left the cake inside hoping that power will be back. But it didn’t come for the next two hours. After the oven cooled down, I removed the cake and tested it. It had shrunk in the middle but was baked. I just wrapped everything and refrigerated them praying God that every thing should be fine. I also made the ganache and left it on counter to use it the next day.
The next day, the carving was done properly, the stacking was done and the cake was covered in ganache. Until then every thing was perfect. I started working on fondant as soon as the ganache dried. Once all the tree stump was done, I also worked on the top leaf cake. Then I noticed that something was different in the main cake. The cake started sinking. I have made a great foolish mistake which could not be rectified at this stage. As the bottom cake was not supported properly, the top cake was sinking into the bottom cake. I was devastated. I again thought of stopping at that point, but a voice in me told to proceed. I think this was the fastest painting I have ever done. I did it in 10 minutes and assembled the cake as soon as possible and took photos. After the photo shoot, I had to slice the cake so that it wouldn’t collapse further. Lesson learnt, never ever make a cake without proper support. While explaining the procedure, I will mention about the support but there will be no photos for that. If you are going to try some thing like this keep it in mind and give proper support. Other wise the cake came out fantastic, looked great and I really felt so good looking at the photos.

This is a long post. First I thought of splitting it into two, but I felt an incomplete post will not be very good. So I have given all the step wise photos I took in a single post itself. Go through the photos and descriptions and have a great time!!
Before baking the cake you need to calculate the measurement of your final cake. First I measured the original photo. The length of the pot, the width of the pot, the width of the neck, the diameter of the top leaves portion and whatever measurement you need to make the cake. I wanted to use 6″ for the base of the pot. SO did some calculations based on the ratio of the original picture and came up with the actual measurements of the cake. I am not going to bore you with that but a little knowledge of basic maths is enough to calculate the size of the cake.
For this cake I used three 6″ eggless vanilla cakes, one eggless chocolate sheet cake and one 9″ eggless chocolate cake. For Ganache, I used a batch of dark chocolate ganache. For the syrup, boil 1/4 cup of sugar with 1/4 cup of water until sticky. Cool and use.
This cake needs carving. So use a firm butter based cake. I will be posting my recipes in a week. Feel free to use any cake which is firm and sturdy. The cake must be chill when you attempt carving so that there will be lesser crumbs and lesser wastage. Let us start.

First assemble the cakes, ganache and sugar syrup at the work bench.

On the cake board, apply some ganache.

Trim the crust of a 6″ cake and place it on the cake board.

Apply some syrup and brush to moisten the cake.

Add some ganache.

Spread it evenly with a spatula.

Now place the second trimmed cake on the ganache and brush with syrup.

Place the final cake with upside down and press to seal.

Now cut the chocolate sheet cake for the neck of the pot.

I used the bowl as reference for the neck. Cut out as many circles as possible.

Now here is where I did the mistake. I aplied ganache and layered the chocolate circles. But what you need to do is, take four lollipop sticks and insert them at the four points I have marked. Make sure they get inside the cake and touches the base. Trim away excess stick with a cutter or a sharp scissors. These sticks will bear the weight of the chocolate cake neck.

And now there is one more point to be noted here. After inserting the lollipop sticks, you need a base for the chocolate cake. Cut a cake board to the size of the chocolate cake circle and poke a hole in the middle. Now place this on the vanilla cake above the lollipop sticks. Apply some ganache on the board and stack the chocolate cake circles. as shown.

Once the required length is required stop stacking.

For the final support, insert a wooden dowel rod through all the layers. Do you remember the hole we made in the base of chocolate cake? The dowel must pass into it and go all the way down until it touches the board. Now your cake layers are secure and will not crash.


Once the layers are secure, start the carving. The bottom of the pot is supposed to be curved. So start with the top of the base. Use a serrated knife to carve.

Make sure that the shape is regular around the cake.

Now carve the bottom.

Does it resemble a pot?

Apply ganache. Start from the base.

Apply it all over. Do not worry about smooth finish. You need to seal the crumbs.

Now apply ganache on the neck.

Using a scraper, smooth out the base.

This is the completed pot.

Now using four more lollipop sticks, insert them as shown. This is going to be the support for the top most layer. Trim it so that a little bit of the stick is sticking out. Make sure they are of the same length.Now set it aside until the ganache is dry. It may take 4-8 hours.

For the top cake, place the cake on a board and mark the circumference.

Remove the cake. This is the size of the board we need.

Using a knife cut away the excess. It is hard work. It is really painful.

Apply some ganache on the board.

Place the cake on it.

Now trim this cake to a dome.

Apply some ganache.

Spread it to coat it evenly. Set aside.

I just checked it with the original image.

Now it is fondant time. As we need to make the bark of a tree, I wanted the base colour to be brown. But dark brown is not necessary. So I added white to my chocolate fondant. Knead it so that the colours merge thoroughly.

Here is the light brown fondant perfect for covering the trunk.

Now roll a piece of fondant. Here is where you need to use your creativity. The logs can be of any length. It is in the way of arranging, we are going to get the look of a trunk.

Apply a little water on the ganache and stick the rolled out fondant.

This is for the door. Cut it according to the size.

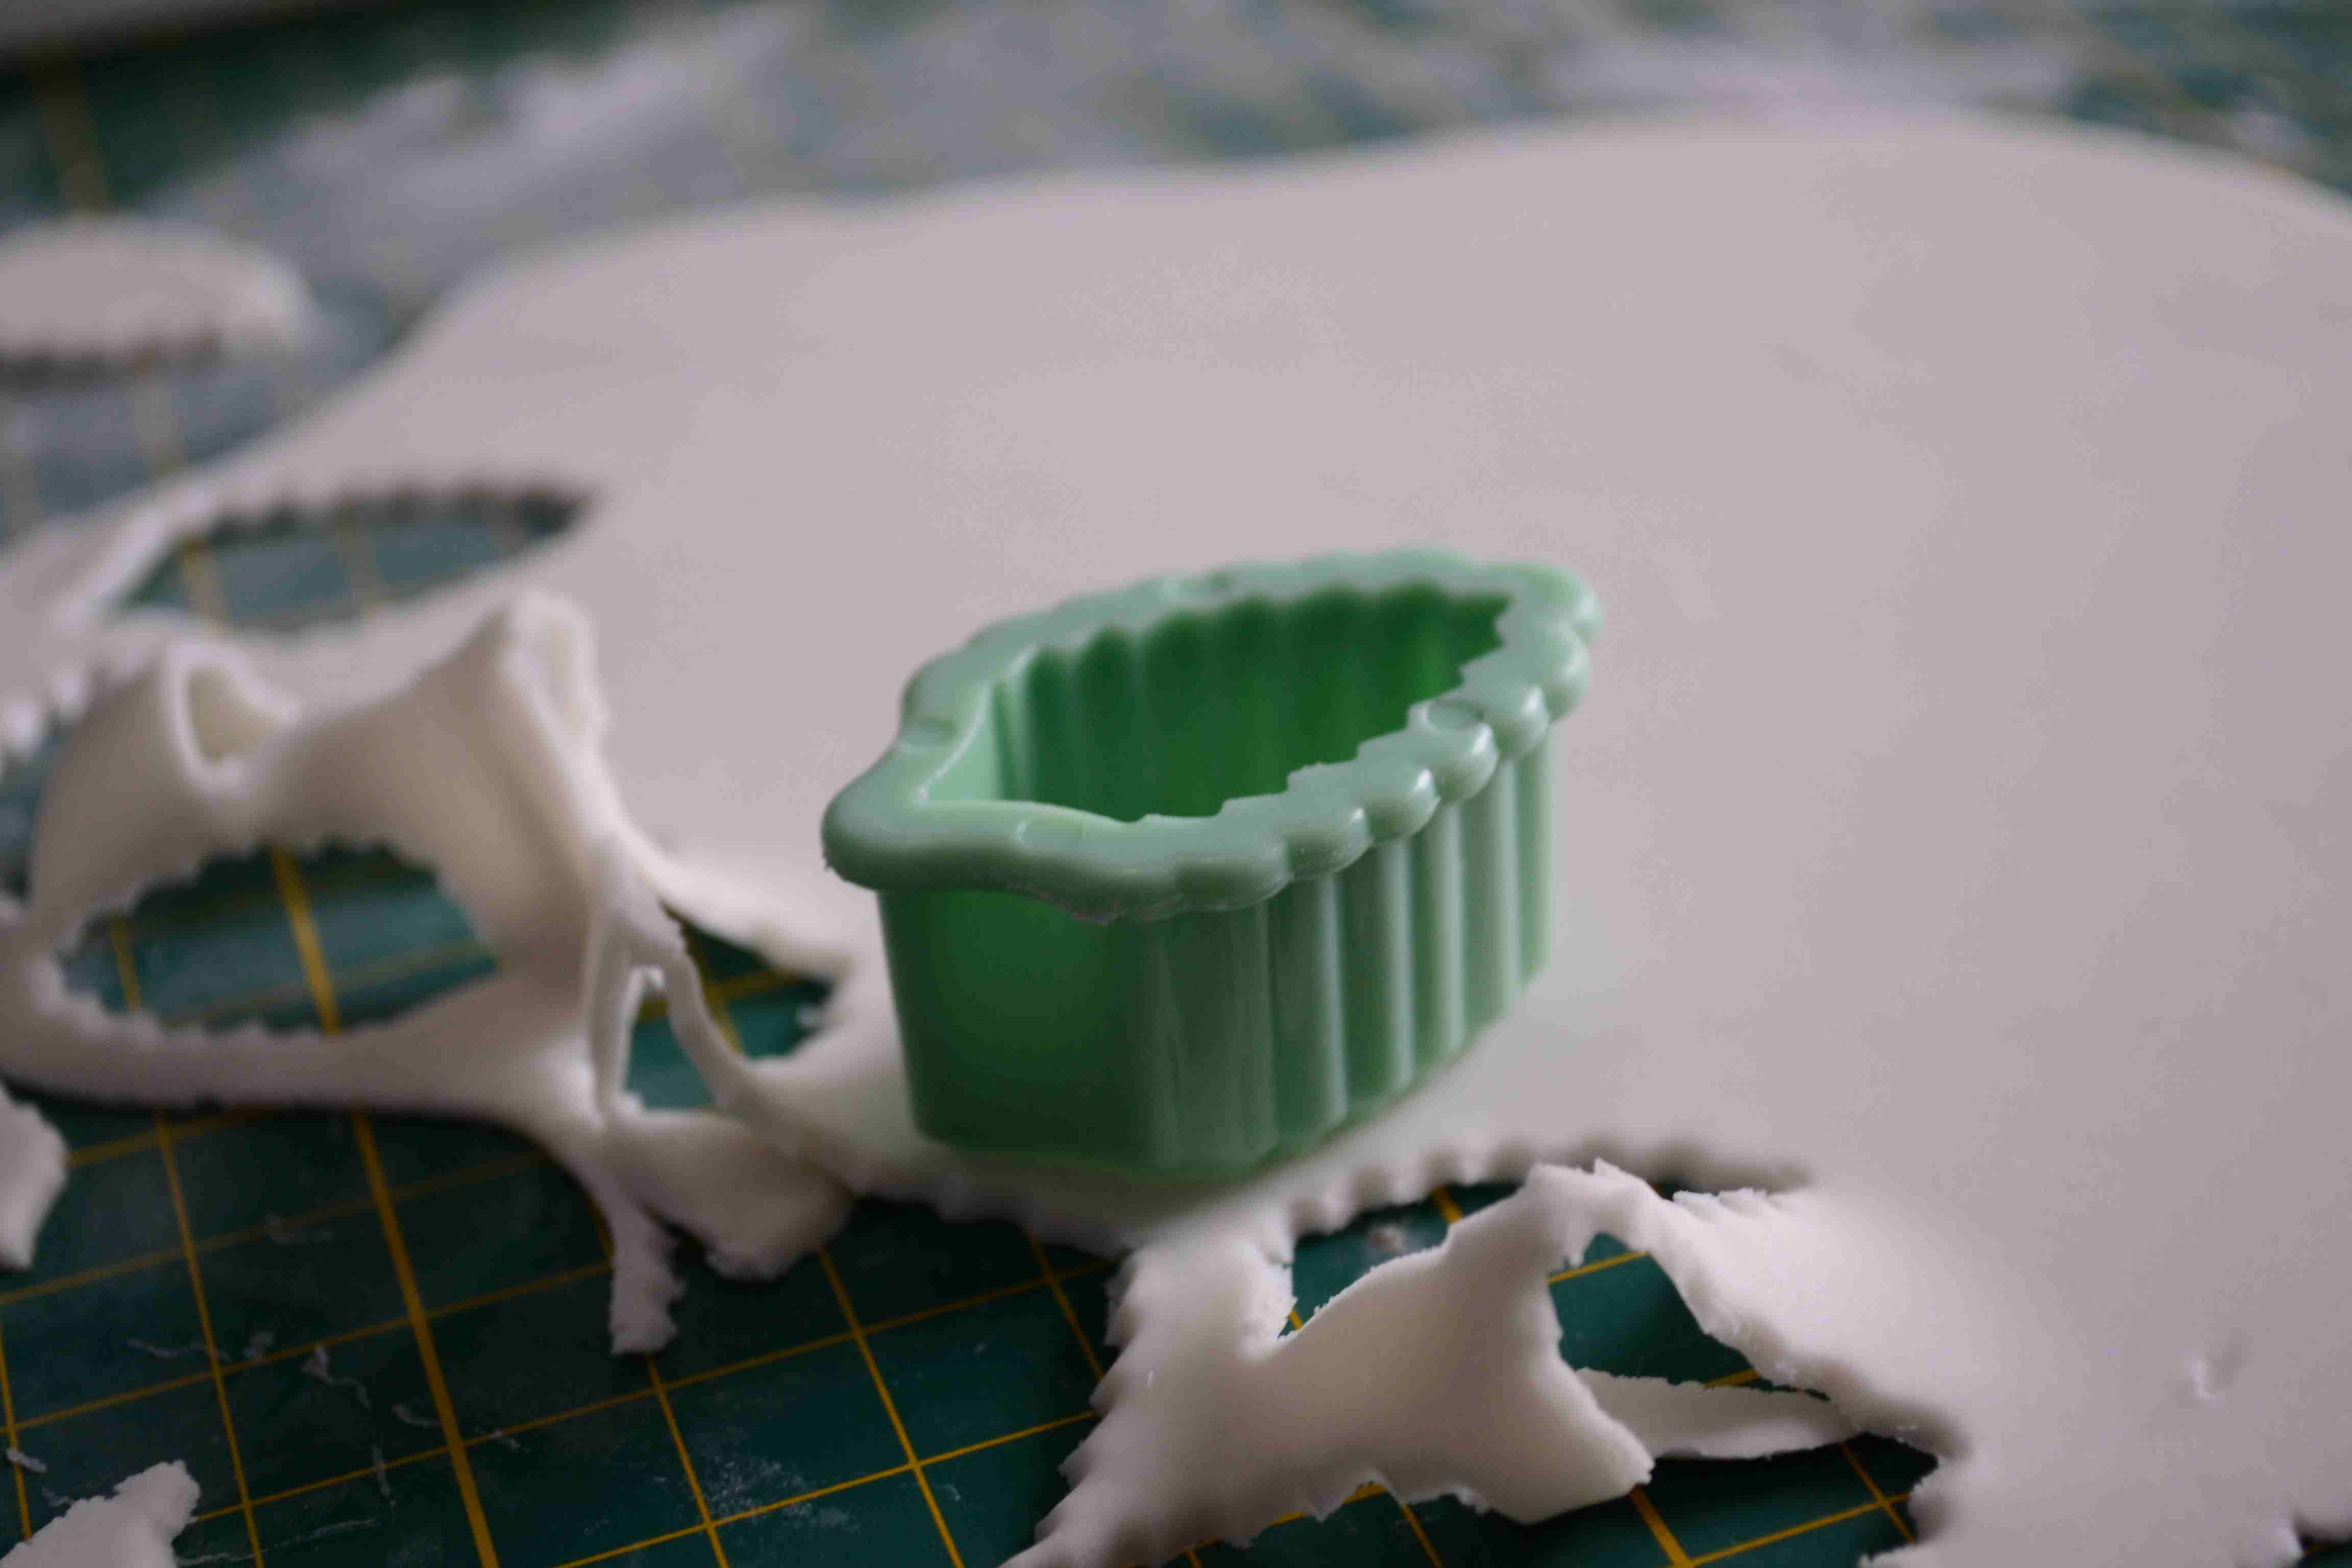
For the window, cut out a circle.

Roll white fondant and stick it in the place where the window will come.

Place the door fondant on the white fondant. Use water to stick the fondant.

Now keep on building the trunk. Use a tooth pick to mark lines on the trunk.

And the window.

Here is the other window near the door.

I just placed a rope of fondant at the top of the pot and placed a butter paper on it so that while placing the cake board, the cake will not come in contact.
Now it is time for some leaves. I took nearly 2 hours to complete the leaf dome.

Roll out the white fondant and cut with a leaf cutter. Do it in batches. We don’t want the leaf to dry before sticking it on the dome.
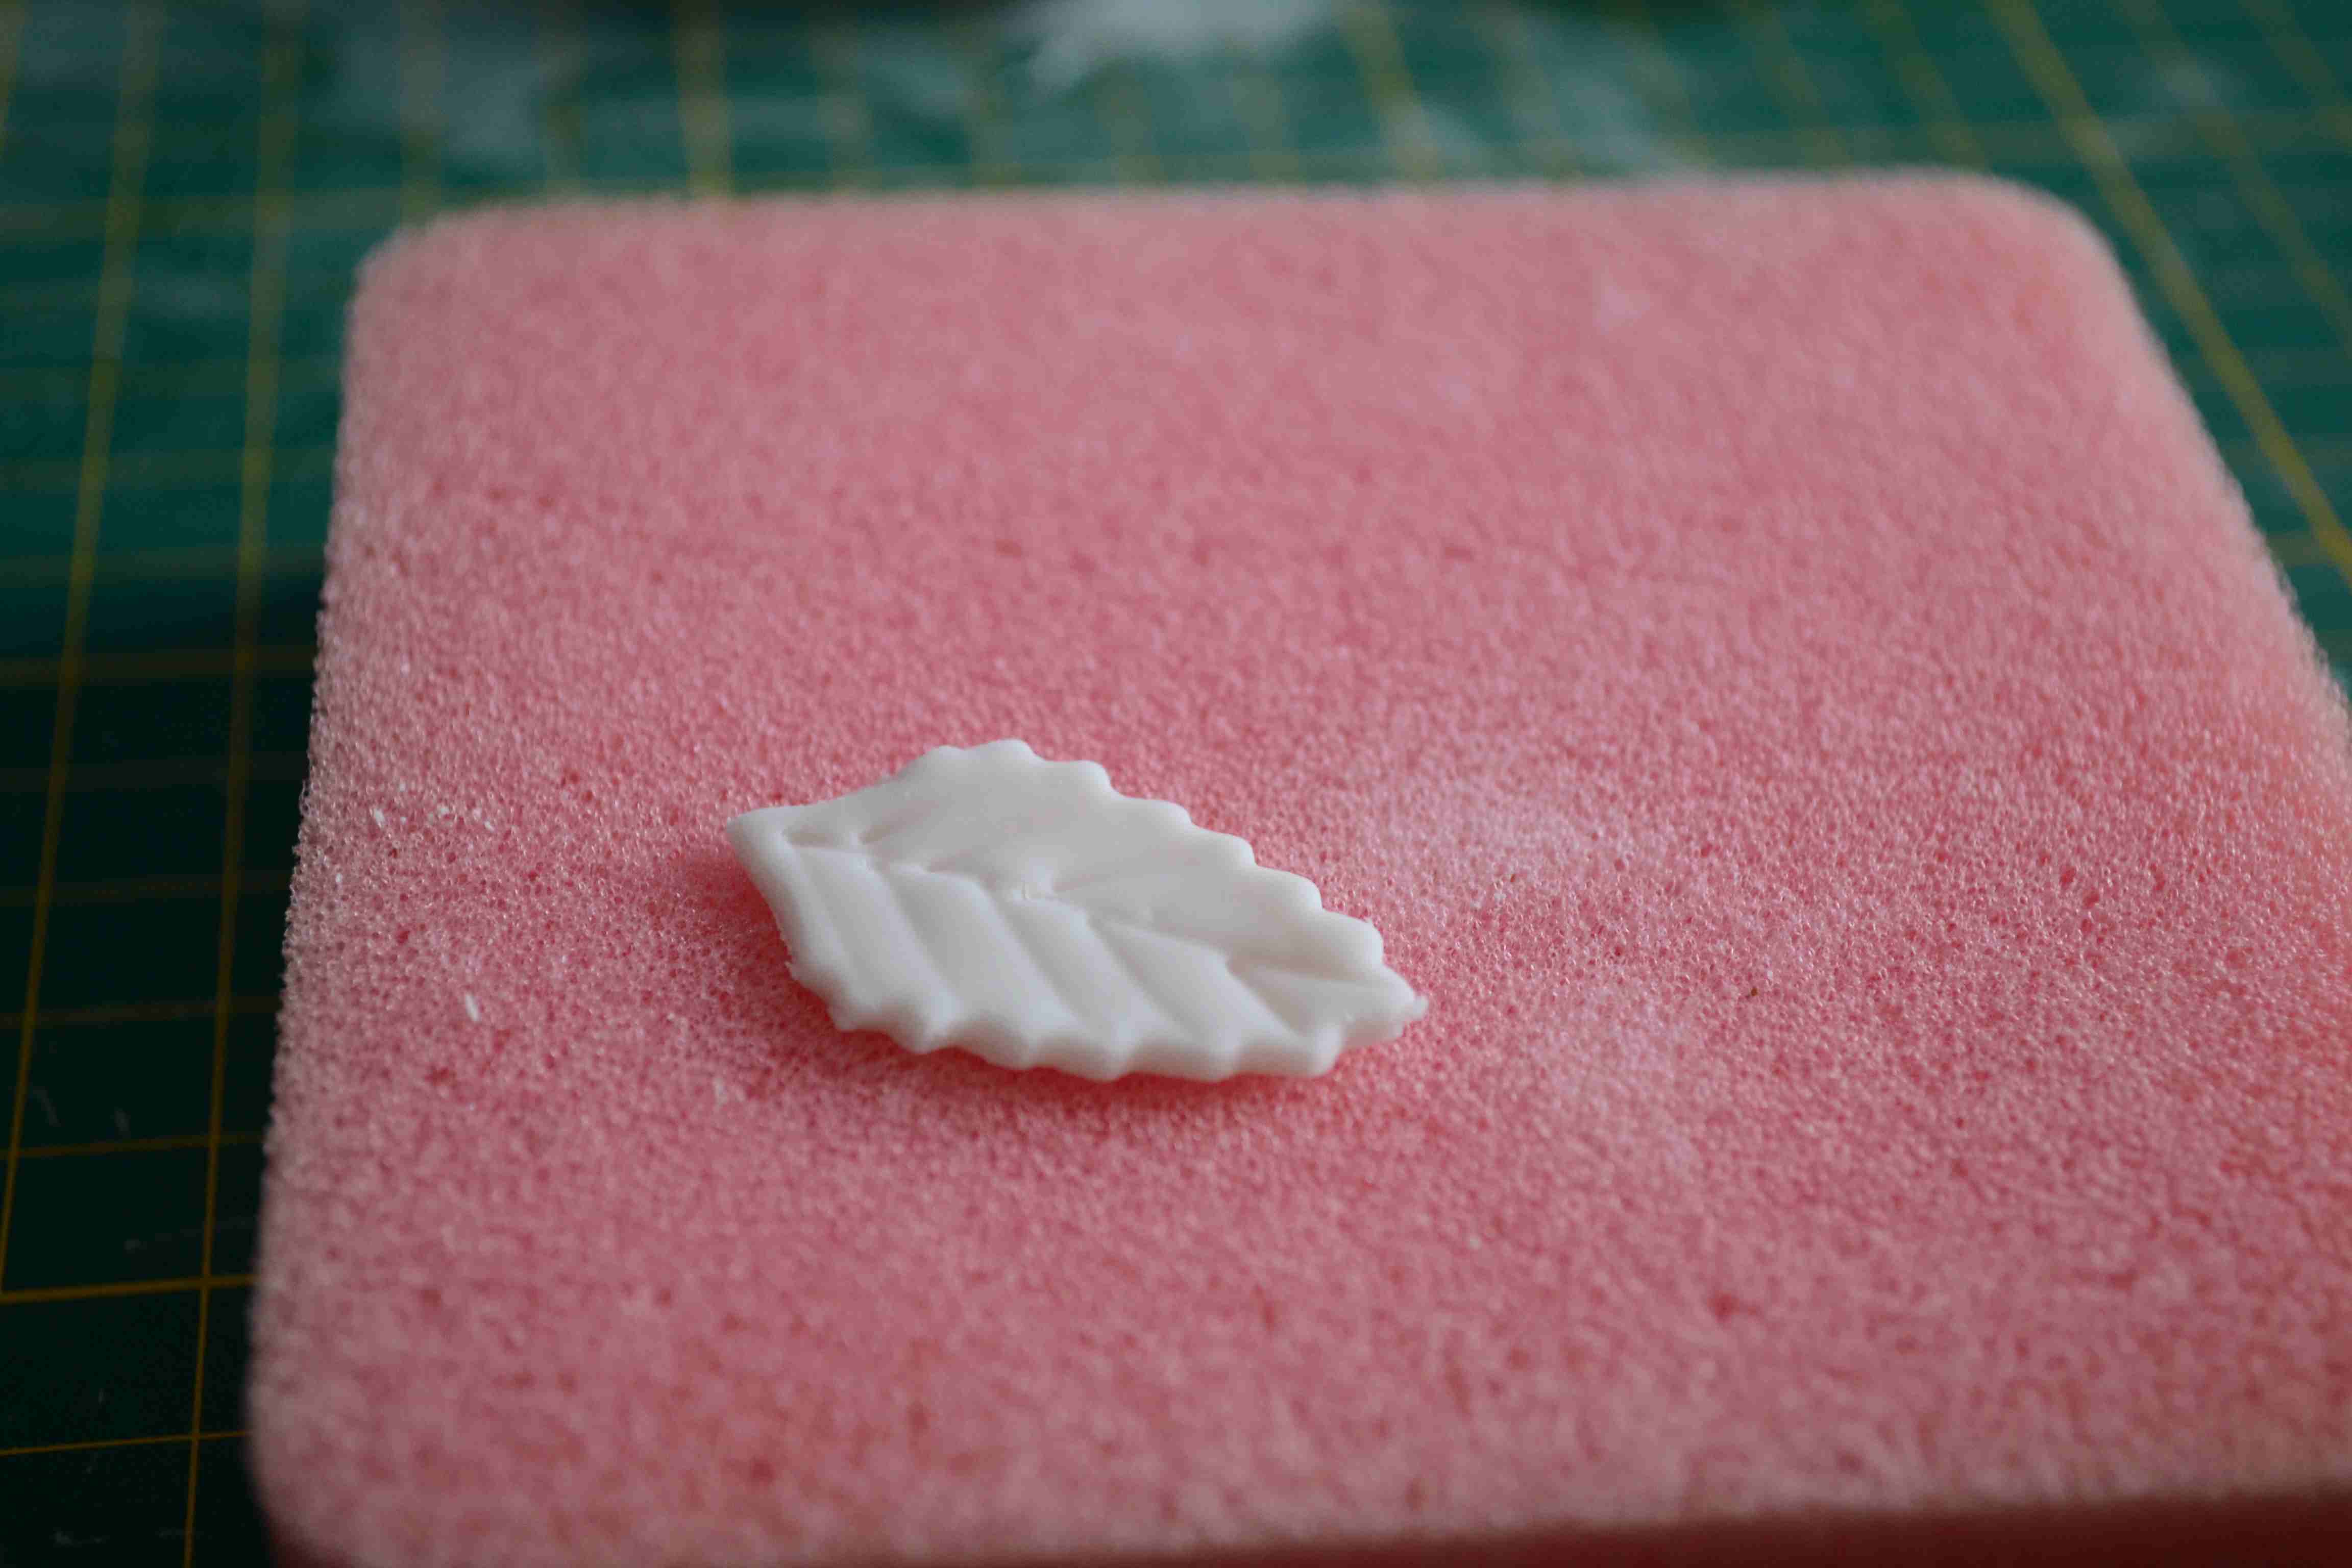
Place the leaf on a foam and with the help of a tooth pick, draw the veins.

Apply some water on the dome and stick the leaf on it.

Do it in layers.

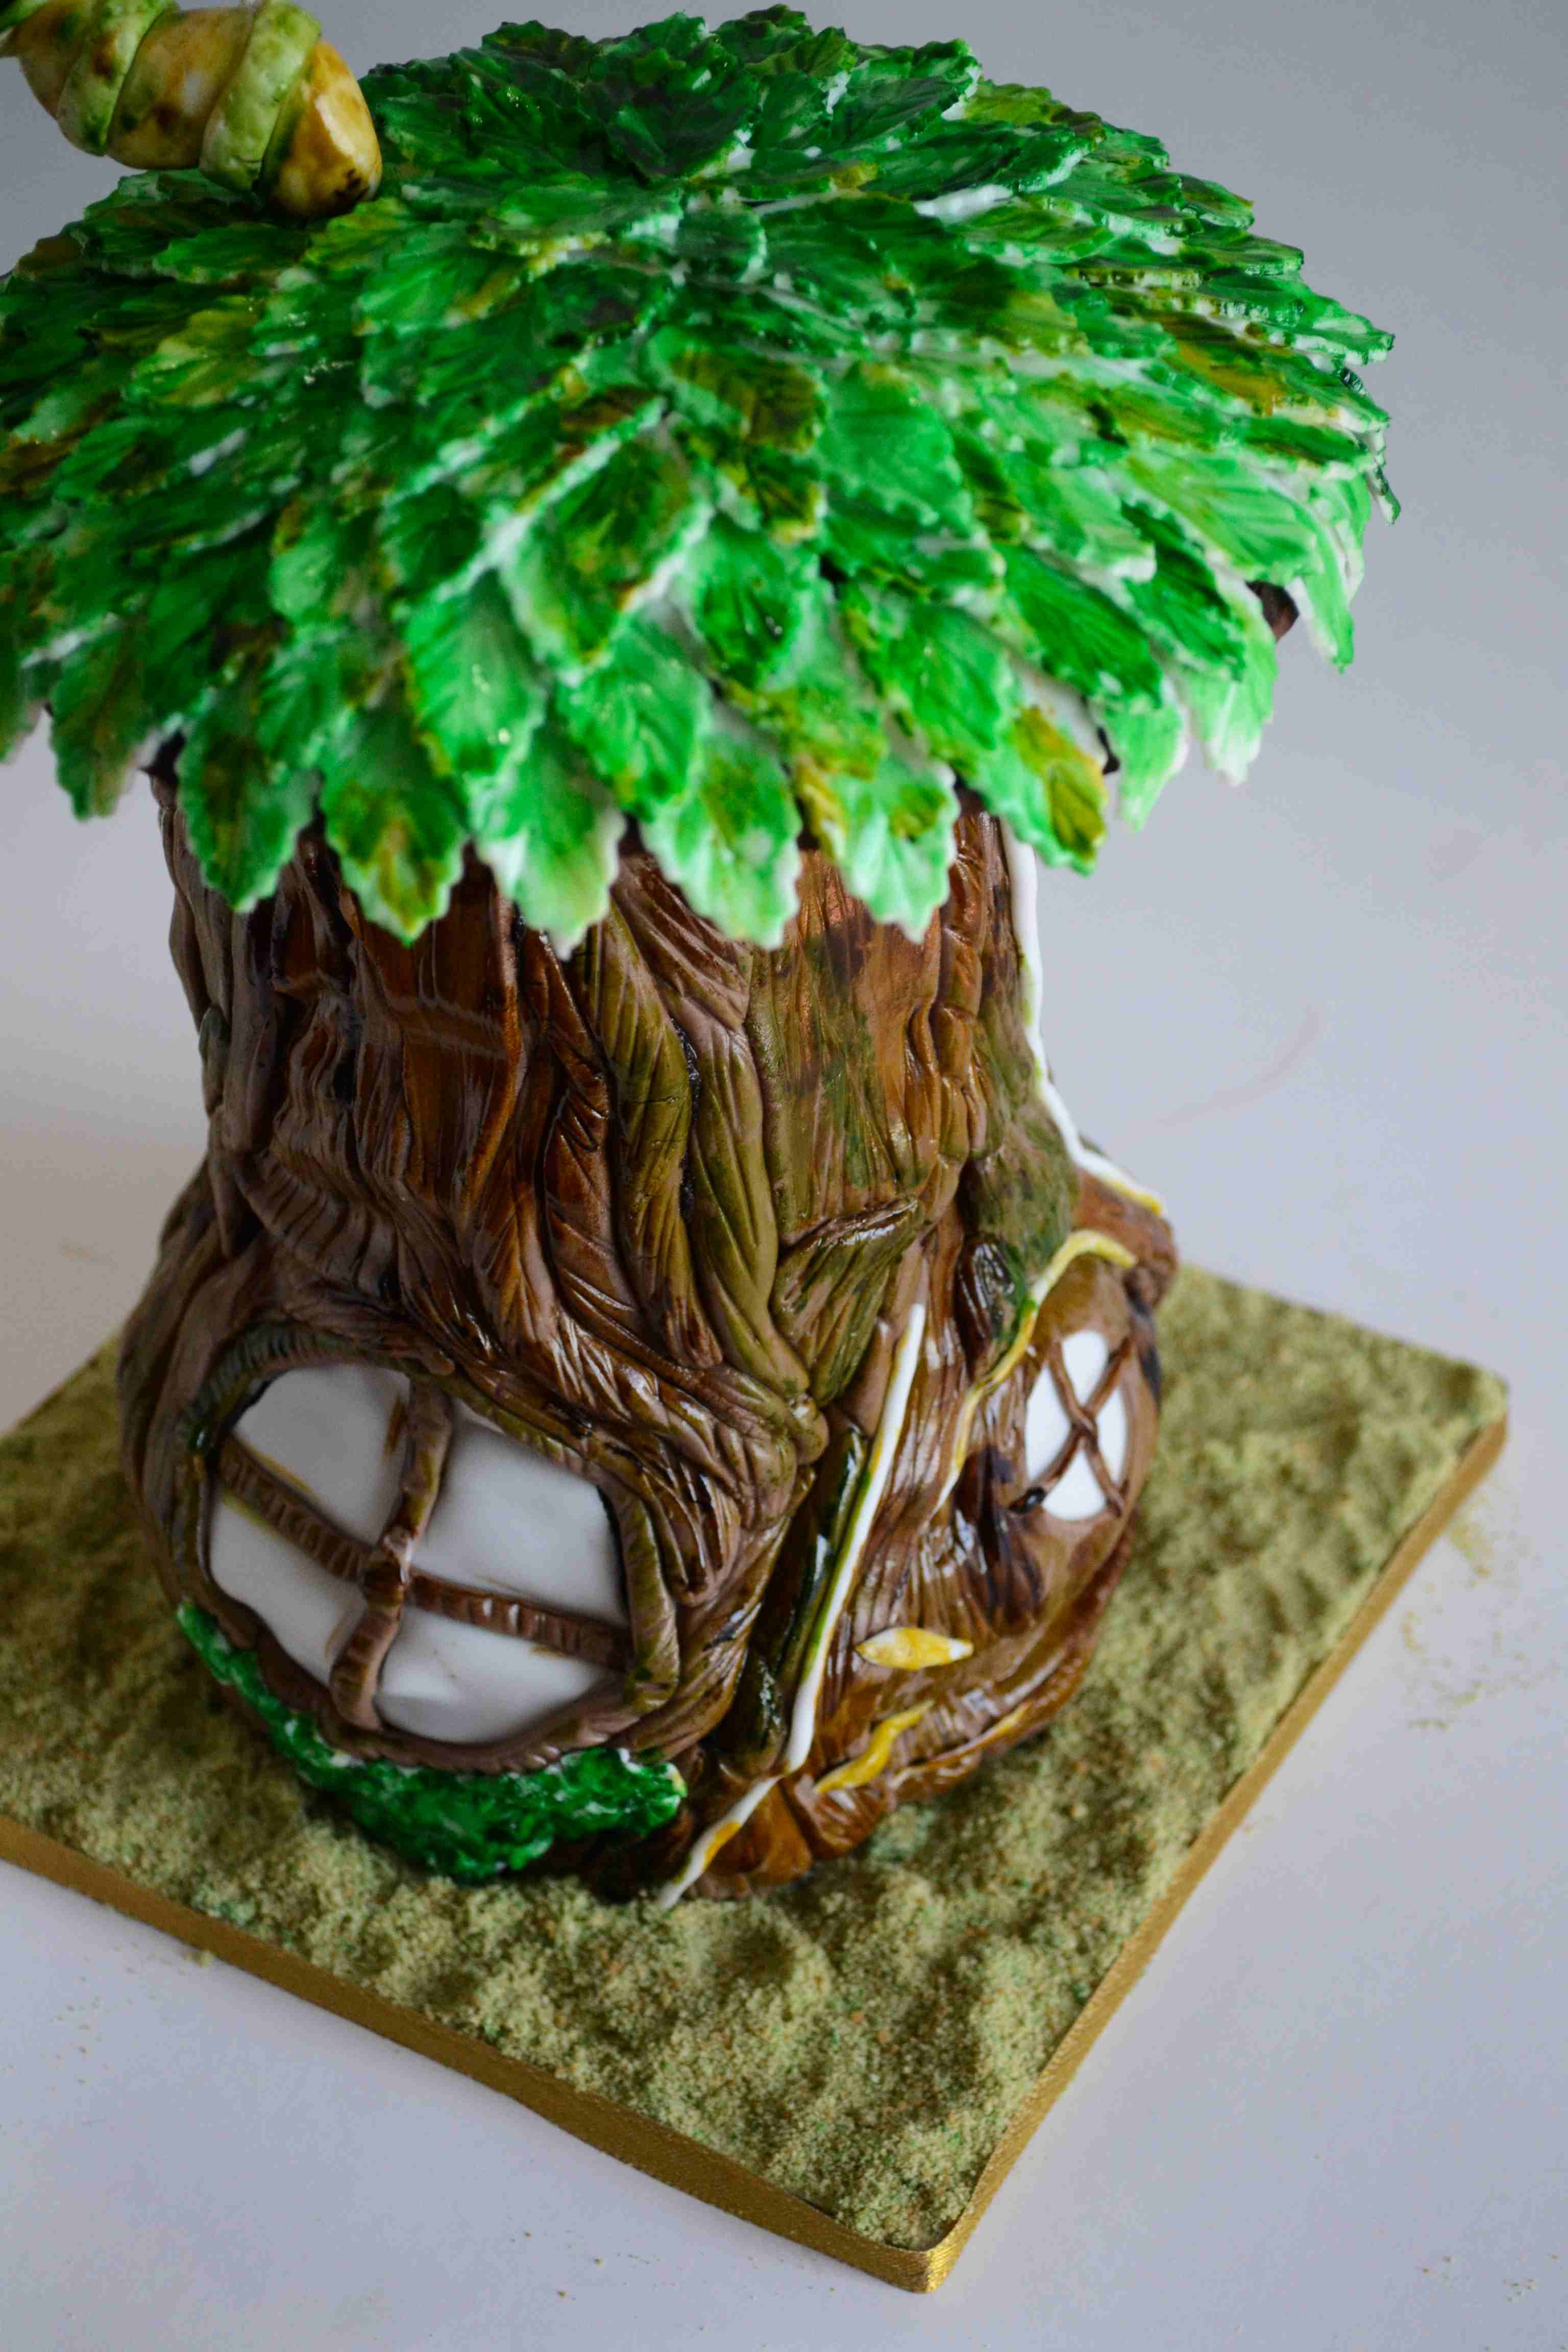
Here is the final arrangement of the cake.

Checking again with the original. The mistake is obvious. The neck of the cake is comparatively larger than the original.

I also used some gum paste to make a chimney.
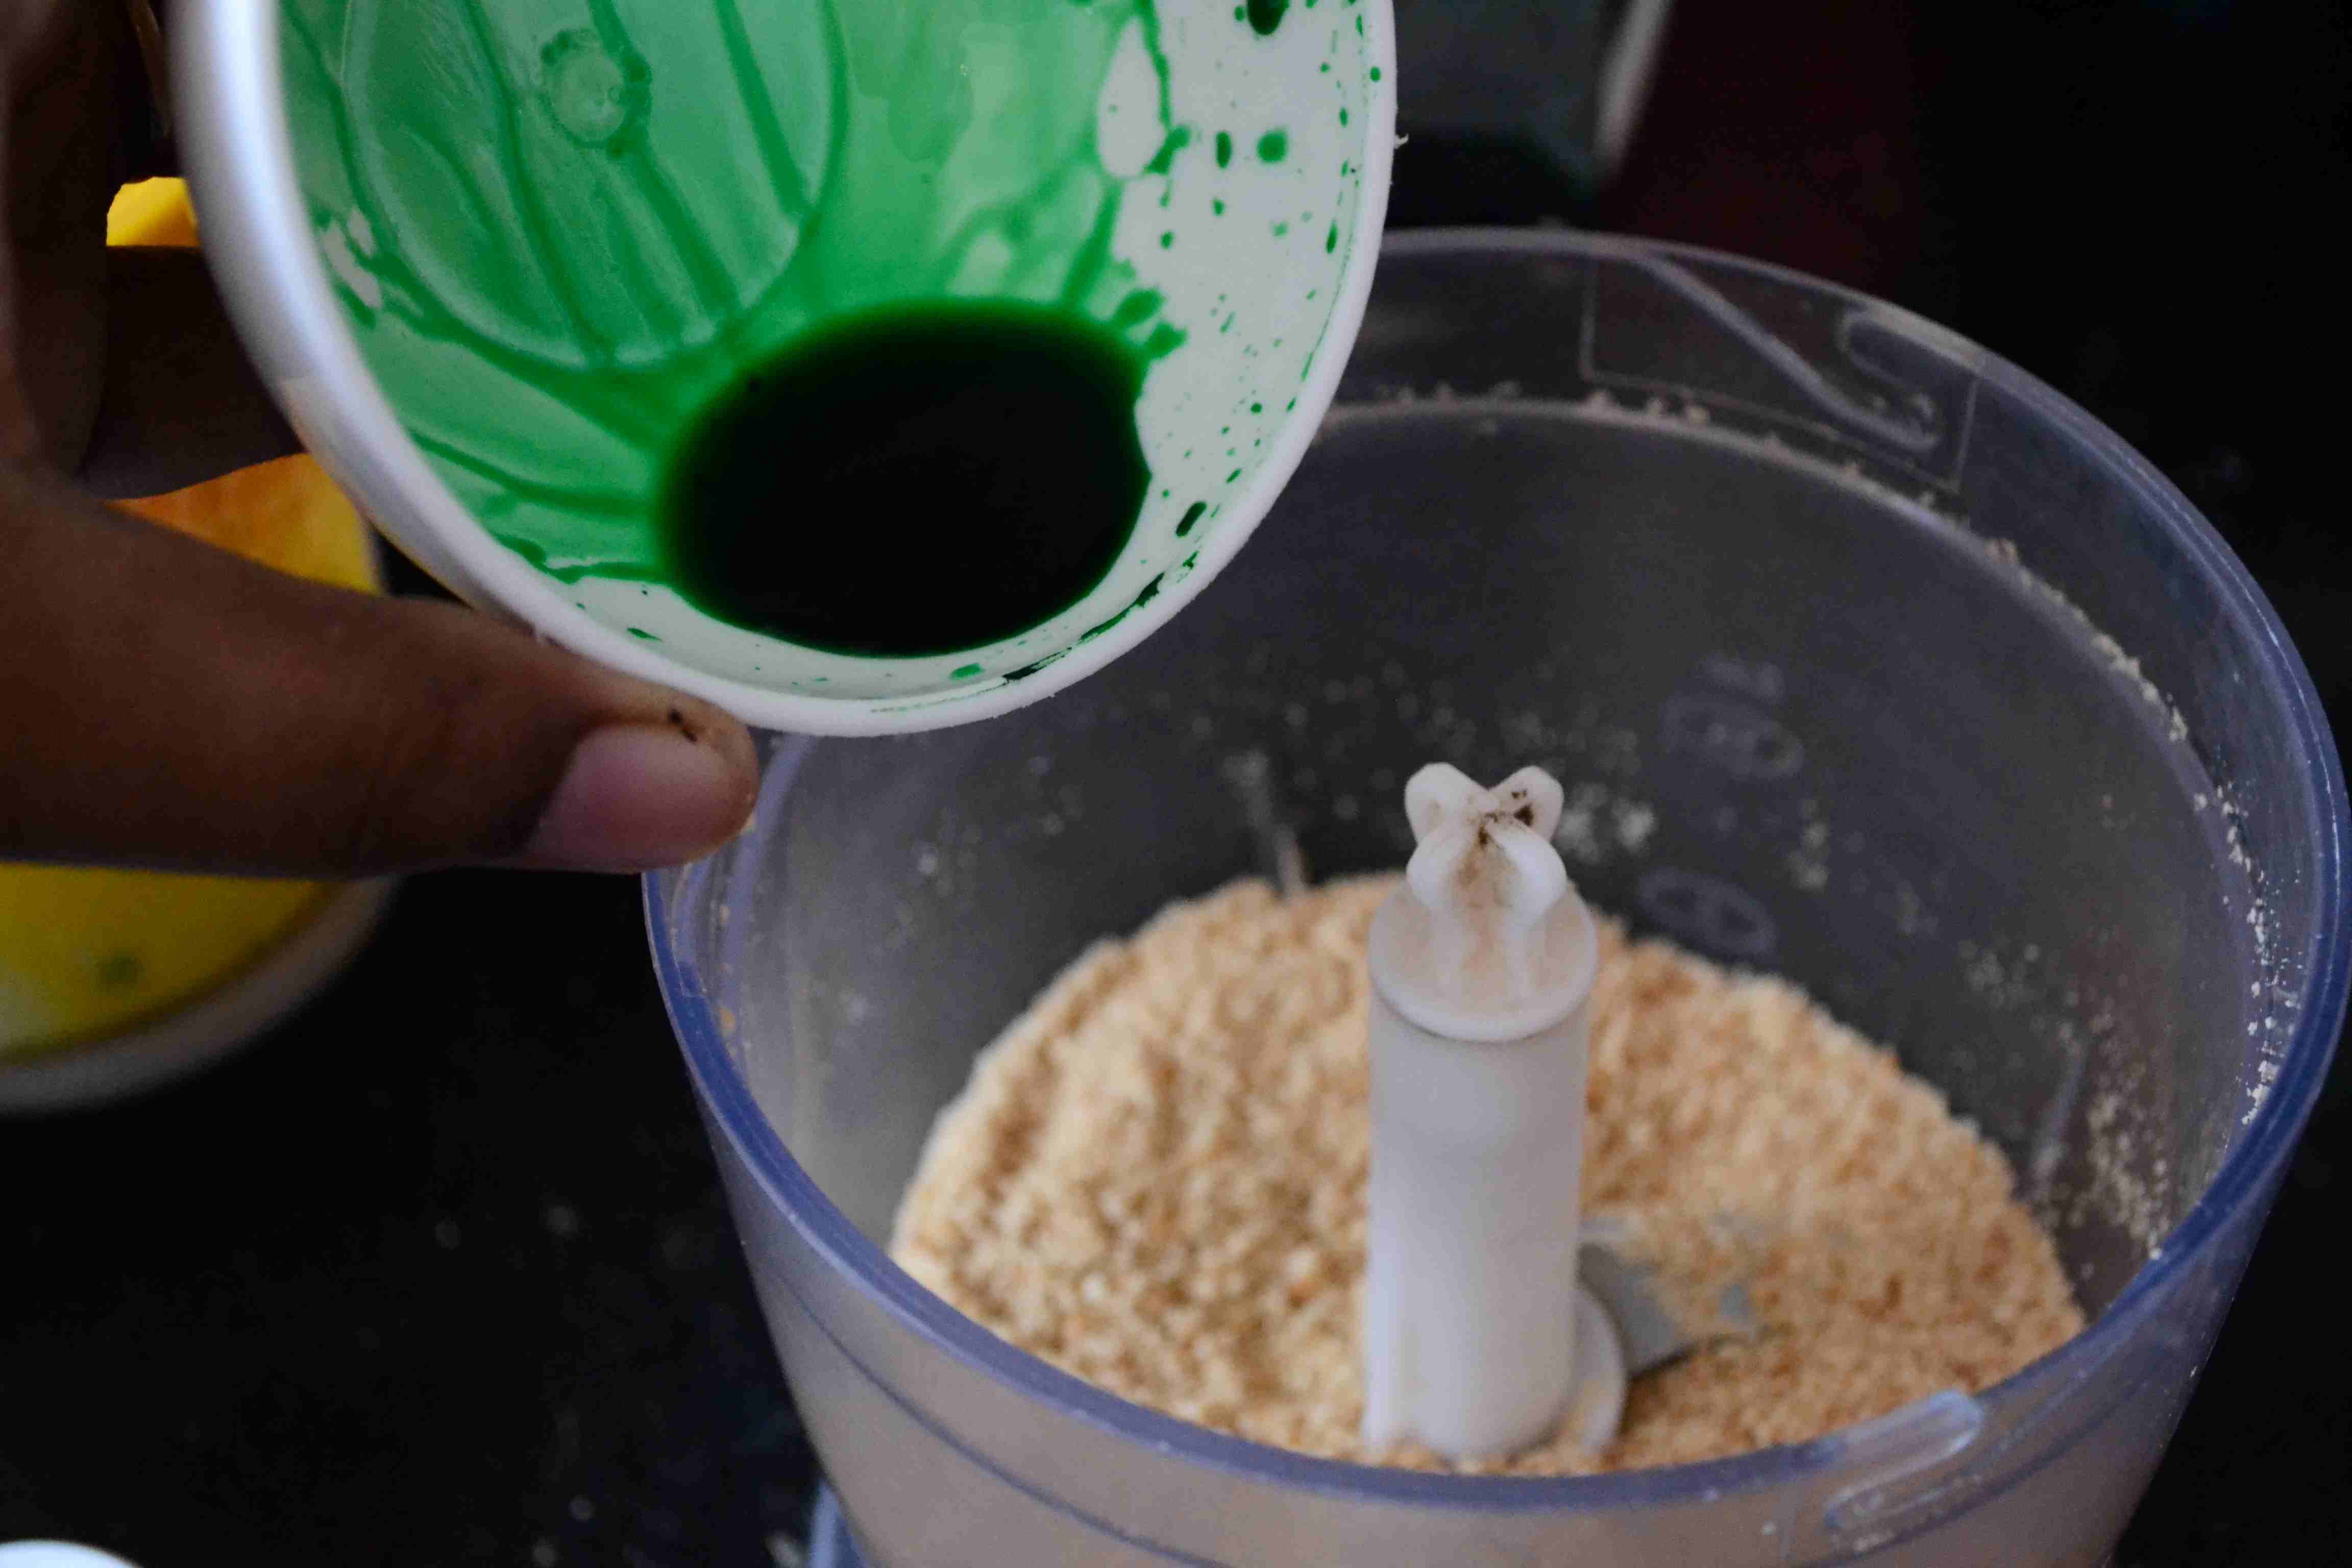
For the grass effect, I added two packs of tiger biscuits to the mixer and made a powder. Then I mixed vodka and green gel colour and added it to the biscuit.
 When I run the mixer, the colour mixes with the biscuits to produce this. From now on, I didn’t take any step wise pictures as I was not sure of finishing it. I added one more cake board in the bottom to make the base thick and attached a golden tape to the sides of my cake board. And I filled the cake board with the crumbs. Then I used gel colours to paint the whole cake. For the trunk I used a combination of brown, green and yellow. For the top most dome, green and yellow did the job. Just unleash your painting skills.

So it is almost like the original.

Disclaimer: I am not a professional cake decorator and I haven’t attended any classes to learn cake decoration. What I have learnt through so many blogs and videos, I try to reproduce. This is my way of making the cake but there may be perfect techniques for better results. I just wanted to share with you what I knew and what I learnt through the process and if it is useful for atleast one person, I would be really happy. Thank you so much for reading the whole post with patience. Happy Baking and Decorating!!!


Great job giving step by step pics..wonderfully done.
Hi Gaythri,
Beautifully done. So sweet of you to share the method in detail with lot of proper photos.You are doing excellent service. May God bless you. I always admire the way you have handled your cooking blog.- RadhaRamesh
cool looks beautiful
Thank you for sharing this! I’m sure taking the photos throughout the decorating period must have been difficult…but it’s so helpful for me to see them. And despite the problems you faced, you have done a great job! It looks lovely!
This is incredible.. You are so humble even if multi talented.. Thank you
akka wat a creation and there is no difference between yours and original one.kudos akka
Beautiful description n lots n lots of patience Gayatri..Yes indeed one learns from mistakes! U have so humbly said it…Your cake is awesome.. Thanks for sharing..I am not a baker at all..but i love reading your posts!!Keep posting your experience tips n tricks for us..Congratulations n all the very best for future ventures! lots of love!!!
Such a detailed explanation! hats off to your patience in putting together this tutorial.
Kudos to you. your cake looks almost similar to the original. Appreciate your patience for trying this and it’s very useful with detail photos and procedure.
Hi Gayatri,
Great job done. Looks very beautiful. Thanks for sharing the same. Please continue the good work.
words cannot express how you have done beautifully. i feel you do not need to put discliamer, it just perfect. i could see the passion in you. God give all strength to you. Your mother is with you. She is with your creation, you can see her in your daughters face. Hugs
Wow! what a lot of work Gayathri! I really admire your patience. I love that you share so generously and I have pinned some of your recipes to try out. So far only tried the sugar cookies and they came out very well. Thank you again for your generous spirit and may you be blessed in your baking journey.
Ur just too gud and an inspiration for d starters very neatly explained easy to understand thanks a lot to you
hats off to you…this is a wonderful job you have done…treat to the eyes,,,
Wow!! Great effort. Thanks for sharing
Such a great step wise cake decoration article. Anyone who loves cake decoration will definitely read this article fully. Was very userful.