Nowadays, I have stopped taking orders and classes and have been concentrating on more interesting works. For the past four months I have been part of an wonderful group Let’s Do It With Fondbites, brain child of Subhashini and we create one cake a month according to the theme selected by our leader. I have done four cakes so far and this is my fifth cake. Except for last month, I made tutorials for three cakes. You will find the links at the end of this post.

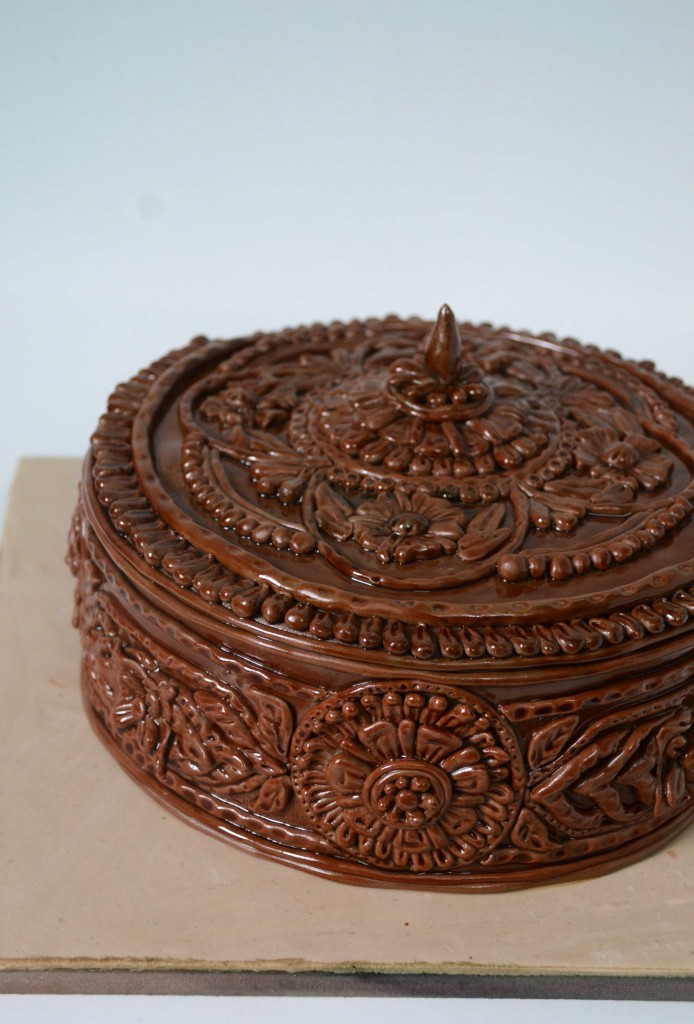
Coming to this cake, we were asked to make a cake resembling an intricately carved wooden item. Before starting on a cake, I will do some research on that topic. So I searched for similar cakes, but there were very little and they didn’t give me any ideas. So I searched for original wood designs and narrowed my selection to three. First one was small flowers with vines and leaves. My first try was to create a mould with the design and use it to take impressions on fondant. I even made some designs with m-seal and made a mould with left over sugar paste ( will some time post about this technique). But I didn’t like the finish of the moulded fondant. They were not clean at the edges. So I had to ditch that plan.
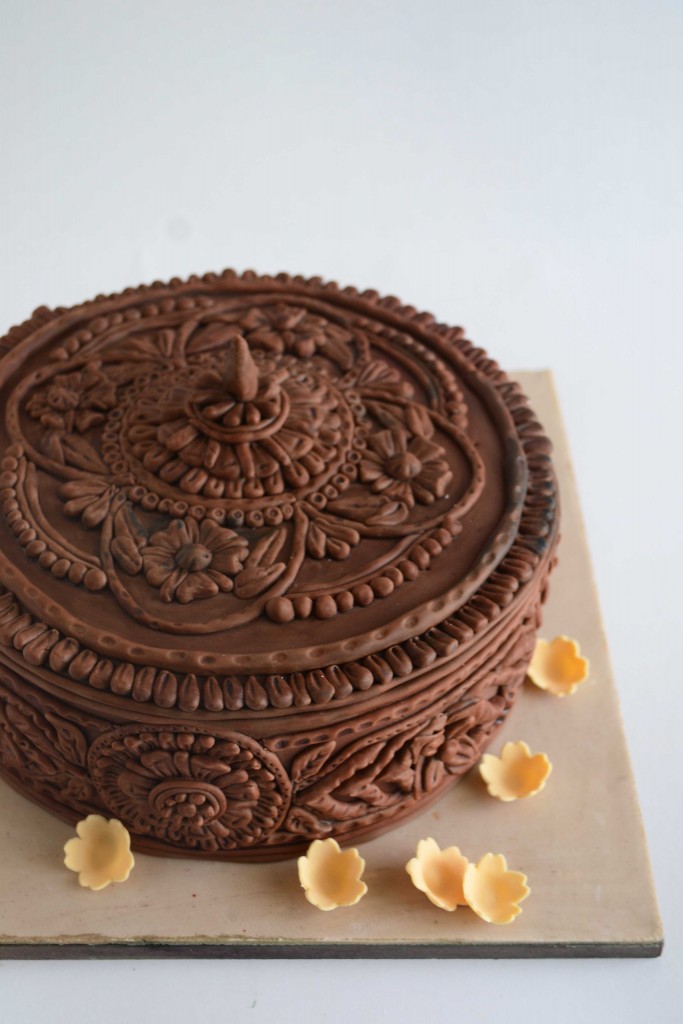
This is the design I used as an inspiration for my cake. This supposed to be a door design, but I used it to create a box. While starting the cake, I had a different design in mind. I thought of making the box and a lid separately, but once I finished the box, I felt that it was enough to depict both the lid and the box. So the other cake I made was kept for snacking. I started with the top of the cake. Always, first attempt looks dull compared to the next attempts. SO when I finished the sides, I felt that it looked not that good and also flat. So I incorporated the same design into an elevated dome for the lid. And the top pear shape on the lid was hubby’s idea. Yes, I always ask him for ideas.
I was so happy with how the cake turned. So I took some snaps and thought it was over. But when I saw the finished snaps, I thought something was missing. But it was evening and dark and so postponed any other corrections to the morning and went to bed happily. The next day, I just added some sugar flowers to the board and took the snaps again. Now it was looking great. I even planned on taking a snap along with me but because of over enthusiasm, I sliced the cake so that I could take a snap of the cross section.
And here is the cross section of the cake. Looks absolutely delicious, isn’t it? This cake is one of my new recipes developed from one previous cake. That is also for another post. And even I got a snap of me with the cake after slicing.
This cake will always be close to my heart because, it got me a special place in the Home Baker’s Guild . This post broke records with 3500 likes and nearly 470 comments in the span of 25 hours. And so many of the members were asking for a tutorial on this technique. I was on cloud nine. And this tutorial is for all those who gave me great appreciation for my work.
This is my first video tutorial on a fondant technique and please bear with me if it not perfect. After you watch the tutorial, here are some points to be noted if you are designing a wood carved effect cake.
First study the design carefully. As we are giving three dimensional effect on cake, you must be sure where to start to get the necessary effect. In this cake, I have started from the outer edge and built the design towards inside. If I have done the opposite, the result will be different but still beautiful. So start work after planning.
Some times ideas come while working. So feel free to change them.
If you are working on a floral pattern, then you need to design the veins part and leaves before attempting for flowers.
And keep the cake structure steady. Even though we are going to do minute work on the cake, finally, it is the cake that will matter once it is cut. No one will be looking at the design after slicing. For painting, use gel colours with vodka to get the glaze effect.
If you have any doubts regarding designs, mail me at gayathriraani@gmail.com . If I can help you I will surely reply. But keep in mind that I too have a personal life and don’t expect me to reply your query in minutes. Give me a day or two.
 Thank you so much for patiently reading my post and watching the video. Please like the video and subscribe to my channel to get updates.
My Cakes so far:

Black Board Effect on Cake

Fairy Tea Pot Cake

Fairy Tale Cake – Snow White, Magic Mirror, evil queen, Seven Dwarfs and Prince Charming
Trunk Box Cake


Impressive. Great job. Thanks a lot for sharing the step by step procedure.
Fabulous…. Superb…. Speechless….u r loaded with patience
Oh no, you cut the cake…… That cake looks so beautiful that I would preserve it just like that, Very well done Gayathri and hats off to u
Oh my god! I’m speechless. You are so talented! Love every single cake pictured here. God bless.
Nice tips and tricks !
OMG!!!! You are brilliant!!! amazingly decorated cake…
Wow…super..am a regular follower of your blog…can you pls make tutorial about modeling chocolate…
Fantastic. ..lots of learning
Omg u r absolutely super
The wooden box cake is a work of art! Really inspiring, thank you.
Thanks man, for all the recipes. I really enjoy them.
I am not able to get Fondant Recipe.
Can you please help me.
Thanks
God bless
Please check this link – https://gayathriscookspot.com/2015/06/homemade-fondant-recipe/