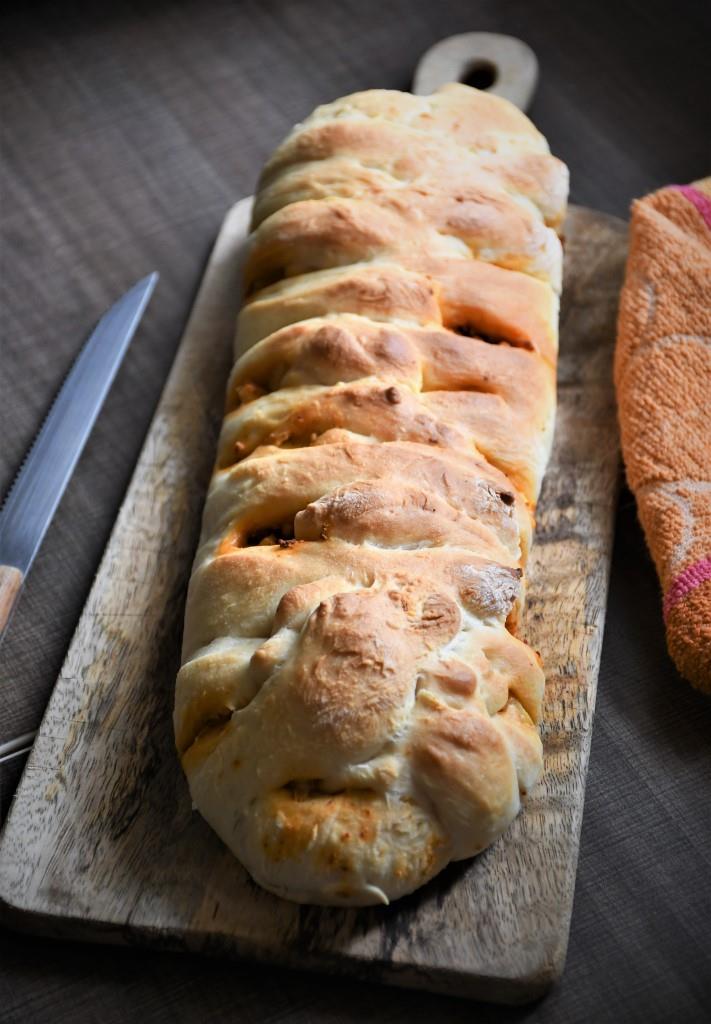
Paneer Stuffed Braided Bread is a really easy to make bread recipe, perfect to be served as a meal or as a snack. It has been a while since I updated my blog. But I have been baking regularly nowadays. As the class preparations take up the entire time, I am unable to concentrate on the blog. But still, when I made this bread, I took some final snaps so that I can share with you all.

I also have started practicing sourdough breads regularly. So when I planned this bread, I wanted to use the sourdough technique in this yeast bread. I must say, it turned out amazing. Very soft and tender. As I kneaded the dough in my mixer, I added a little bit more of water, which made the dough slightly tough to manage. But I did make it with a bit of difficulty. And when I saw that the bread rose beautifully in the oven, I was really happy!
The bread looks amazing and tastes amazing. The dough is prepared like a sourdough bread. Instead of starter, a preferment is used. The total amount of dough is divided, one is used for the pre ferment and the other is mixed with just water and set aside for 45 minutes. Then these two are mixed and finally salt and butter are mixed.
The autolysis and the preferment adds so much softness and stability to the bread dough which gives amazingly soft bread. I am thinking of using the same technique in a sandwich bread too. Let me share when I do it.

Coming to this recipe, you can either use a stand mixer to knead or you can knead it by hand. If kneading by hand, be careful about the water added in pre ferment and the dough. Because it will be extremely difficult to handle a high hydration dough by hand. But if using stand mixer, then your work becomes so much easier.
Trust me, I have started enjoying my bread baking nowadays. Check out the video of my final bread. It will give you an idea of how soft it is. Also, if you haven’t yet followed me on insta, do follow me. I always update all about my experiments there.
Paneer Stuffed Braided Bread-Flour used:
I have used bread flour in this recipe. But it is not mandatory. As I mentioned earlier, I am experimenting with methods and flours in breads. Nowadays I have started using bread flour in recipes and I feel that they are relatively stronger than maida. But again, it is not mandatory. You can use maida if you don’t have bread flour. If using whole wheat, then add 5 gm of gluten for every 100 gm of flour. This will give a good stretch to your dough and it will also be lighter.

Paneer Stuffed Braided Bread – Filling:
I have used a spicy paneer filling for my bread. But you can get creative with the stuffing recipe. If you love chicken, then go for it. Or you can add vegetables/ egg/ meat or any stuffing you love. It is a very versatile recipe. Get creative and make your own favourite. If you try my bread recipe, let me know in comments. Or please tag me in FB or Instagram. It will be really good to see your creations.

Paneer stuffed Braided Bread Recipe
Ingredients
For The Pre Ferment:
- 50 gm Maida/ Bread Flour
- 1 tsp Instant Yeast
- Water as needed
For The Bread:
- 200 gm Bread flour / Maida
- 1/2 tsp Salt
- Water as needed
- 15 gm Butter
For The Stuffing:
- 200 gm Paneer
- Salt – to taste
- 1/3 tsp Red chilly Powder
- 1 tbsp Tandoori Masala
- 2 tsp Vinegar
Instructions
Pre Ferment:
- Mix together flour, yeast and enough water to make a thick dough.
- Cover and set aside for 45 minutes.
Autolysis:
- Mix together 200 gm of flour and enough water to make a thick dough.
- Cover and set aside for 45 minutes.
To Make Bread Dough:
- In stand mixer, take the autolysis dough and pre ferment and run the mixer on speed 1 for five minutes.
- Add salt and butter and run the mixer for five more minutes.
- Transfer the dough to an oiled bowl, cover and set aside for first proving.
- It would take anywhere from 45 minutes to 75 minutes.
- Paneer Stuffing:
- Crumble paneer and add all the ingredients.
- Mix well until everything is incorporated.
Making the braid:
- Transfer the proved dough onto counter dusted with generous flour.
- Roll the dough into a rectangle.
- Place the filling in the centre of the rectangle.
- Slice the sides into diagonal lines on all sides.
- Starting from the smallest side, wrap the stripes alternately on top of the filling.
- Finish the last stripe with a little bit of water so that it doesn’t unravel while proving.
- Place the braid on a prepared tray.
- Allow the braid to prove for 20-30 minutes.
- Preheat oven to 200C.
- Apply milk wash on top of the braid with a pastry brush.
- Bake in preheated oven for 20-30 minutes, until the top is golden.
- Remove from oven and transfer the bread to a cutting board.
- Slice it up and serve hot.


wow! you have given detailed explanation! i am surely gona try this recipe! yumm!