Today for the alphabet H in the A-Z themed Blogging Marathon #32, I selected this authentic Gujarathi savoury cake. The recipe is from Aromatic Dining blog. When I first saw the recipe, I was so interested. So when I visited mom’s place I tried it once. I gathered all the ingredients but some how I forgot to add the grated bottle gourd which was in the fridge. Only after preparing the dish did I realize it. Though it turned out tasty I didn’t know how the bottle gourd would affect the final dish. This was the final 10 days I spent with mom. She tasted a small piece of this cake and liked it. When I returned back home I tried it again and this time I remembered to add the bottle gourd. I cooked the Handvo in a pan but you can also bake it. If I had known it earlier then baking would have been my option as it is completely fuss free. The flipping of the handvo in the pan was a great challenge to me. When finished cooking the handvo, I tried to cut it while still hot. It was so soft and I felt that it is under cooked. But it was perfectly cooked. Just leave the handvo to become warm before slicing as it will firm up on cooling. I served it with coconut chutney to PK. He liked it very much. It is a very filling snack and you will be skipping the dinner. There are so many variations of the batter in the blogosphere. Ready made flour is also available in the market. But using lentils makes it more traditional.
Recipe Source: Aromatic Dining
Ingredients:
Raw Rice-1/3 cup
Moong Dhal-1/3 cup
Urad Dhal-1/3 cup
Channa Dhal-1/3 cup
Green Gram-1/3 cup
Curd-1 cup
Asafoetida/ Hing-a pinch
Green Chilly-3
Ginger-a small piece
Garlic-3-4 cloves
Coriander Leaves-4-5 tbs
Salt-to taste
Baking Soda-1 tsp
Bottle Gourd-1 1/2 cups (grated)
Tempering:
Oil-2 tbs
Mustard Seeds-1 tsp
Sesame Seeds-2 tbs
Grated Coconut for Garnish
Procedure:
1. Soak the dhals and rice for 3-4 hours.
2. Drain water. Add curd and grind to smooth batter. You don’t need to add water while grinding as the curd itself is enough.
3. Keep it aside for 7-8 hours for fermentation.
4. Peel skin and seeds of bottle gourd.
5. Grate it and squeeze out the liquid from it.
6. Grind green chillies, ginger and garlic to a coarse paste without adding water.
7. Add the green chilly paste, grated bottle gourd, salt, hing, coriander leaves and baking soda.
8. Mix thoroughly.
9. Heat a non stick pan and add oil.
10. Add the mustard seeds and sesame seeds. Make sure that you scatter them evenly.
11. When they crackle, add the batter gently without disturbing the seeds.
12. Keep flame on low, cover and cook for 5 minutes.
13. Flip the handvo, cover and cook for 15 minutes on low flame.
14. When done remove it to the serving plate.
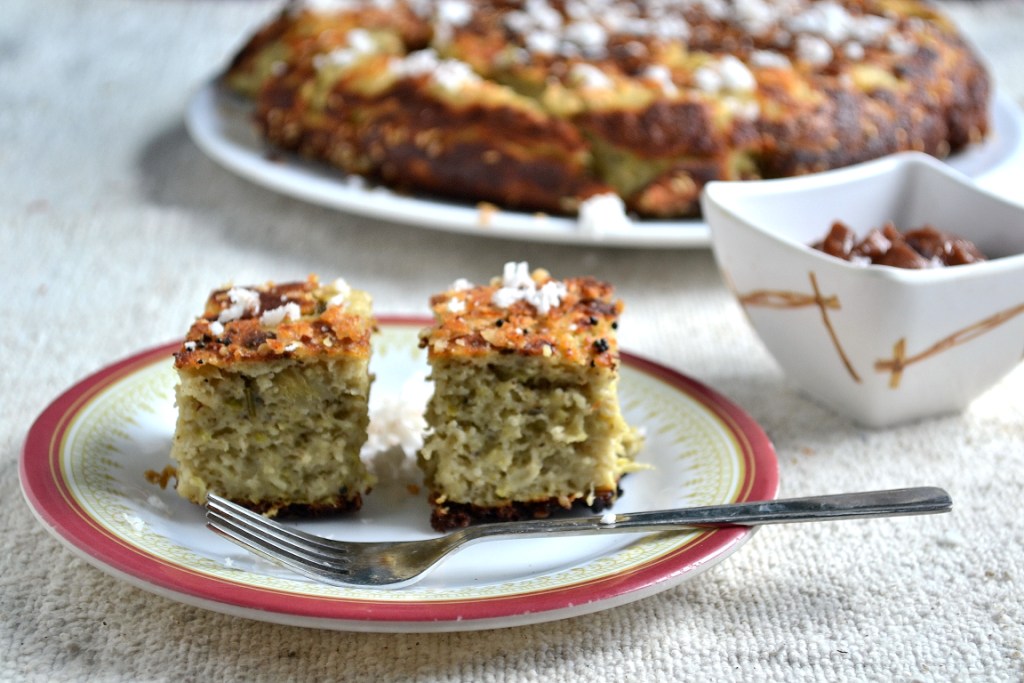
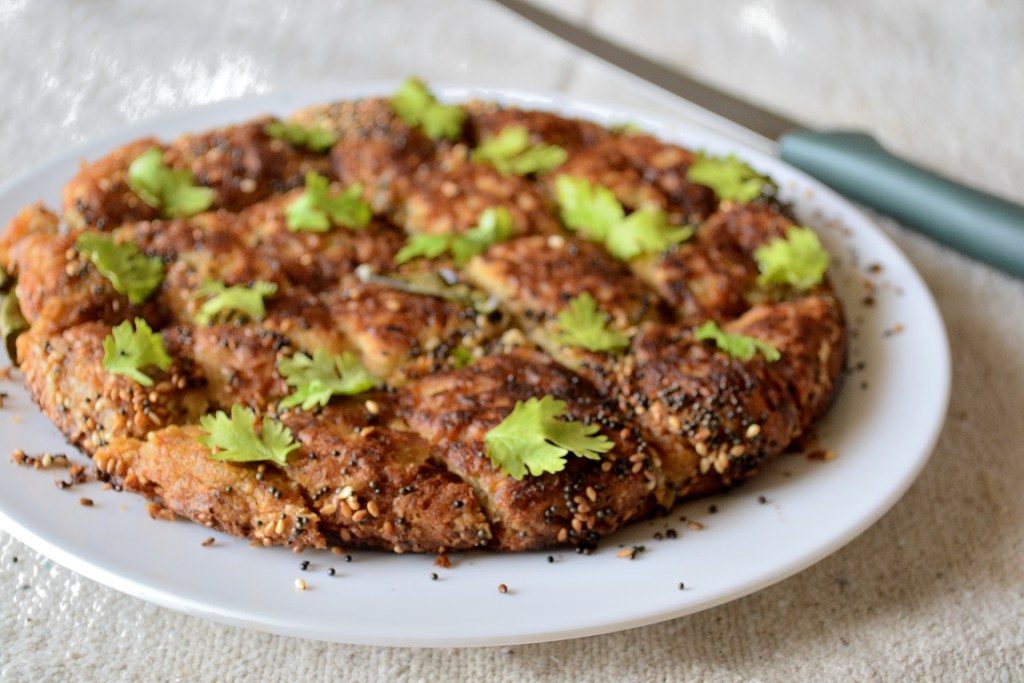
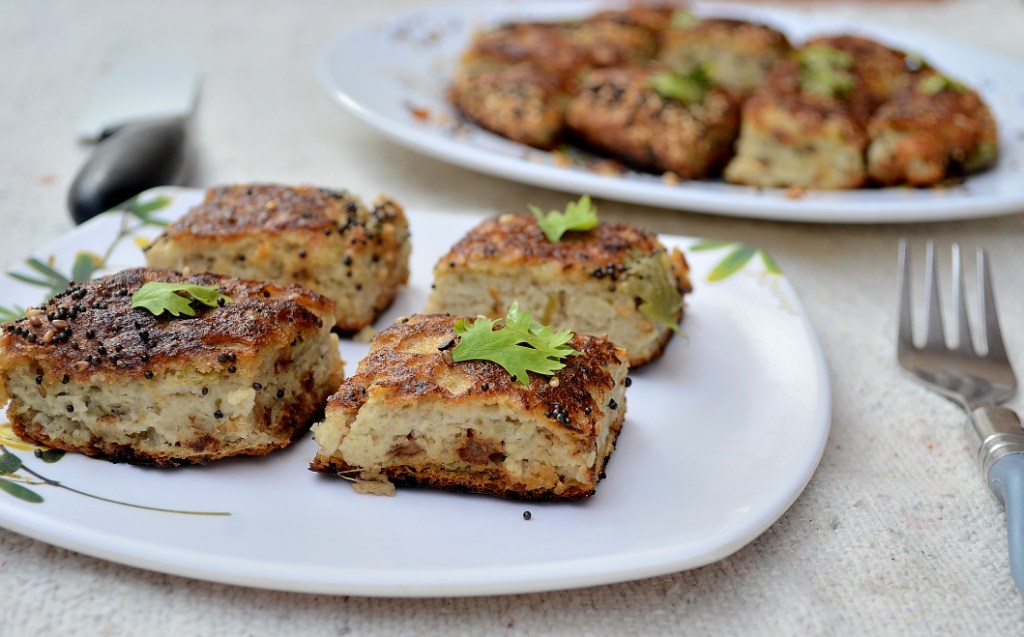
15. Garnish with grated coconut.
16. When warm slice it into squares and serve with coconut chutney.
17. Alternately fill a cake tin with the handvo batter and bake in a 175C oven until the top is golden.
18. Pour the tempering on the baked handvo.
P.S:
1. If preparing handvo during evening, soak the dhals the previous night. Grind batter in the morning. As it has curd, it ferments very fast. So you can prepare it during 3-4 PM.
2. Otherwise grind the batter, ferment it and refrigerate it. Remove from the fridge 2 hours before the preparation time. Add the bottle gourd and other ingredients after the batter comes to room temperature. Cook as per the instructions.
3. If cooking in a pan, keep on checking on the flame. If it is too low, then the handvo will not cook properly. If it is too high then the handvo will get burned. So take care.

Soak dhal and rice and drain.

Add curd and the soaked dhal and rice in a mixer jar.

Grind to a smooth batter. Let it ferment for 7-8 hours.
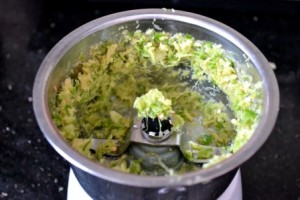
Grind green chillies, garlic and ginger to a coarse mixture without adding water.

Peel, remove the seds and grate the bottle gourd.

Remove the liquid by squeezing it.

Add all the other ingredients to the batter and mix.

In a pan add the tempering ingredients.

Pour the batter without disturbing the tempering.

Cover and cook for 5 minutes.

When done remove lid.

Gently slide it to a plate.

Invert the pan over the handvo.

Now invert the plate so that the handvo is upside down in the pan.

Cover and cook until done. Transfer to serving plate.
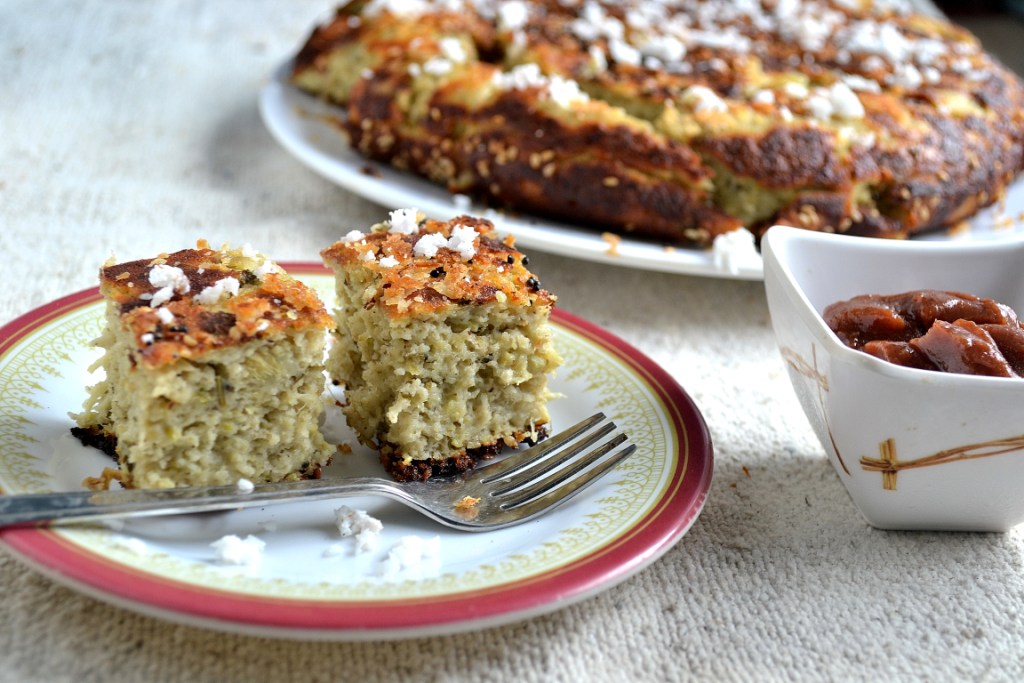
Garnish with grated coconut, slice and serve.
This was my first attempt at handvo with out the bottle gourd.
Came out little thinner than the second attempt.

Logo courtesy : Preeti
Check out the Blogging Marathon page for the other Blogging Marathoners doing BM# 32


How can a Gujju miss having this on tea-time??!!! 🙂 Lovely one… I loved the flavors you infused here…
Read the latest post @ cooking with SJ – http://cookingwithsj.com/2013/09/09/bourani-kachaloo/
Gayathri we make handvo very regularly and your recipe and step by step pics show that you have done a fantastic job ..baking is a better option else we get a special pot for handvo. this was normally made on charcoal.but people do make in pans ..it is faster.
The bottle gourd makes the dish very soft and we have the handvo for dinner.:)
wow Hi 5 Dear !! me too made Handvo but your version is totally different and loving this Pan handvo 🙂 looks so delicious 🙂
Handvo looks delicious.
New dish to me! Try it soon n let you know!
wow delicious Gayathri.. Glad to know that you prepared this dish when your mom was there!!! So when I compared the first and second try, I see the first try is much thinner.. Is the only difference the bottle gourd?
Sowmya
Justsaw a baked version of this handvo, urs looks totally different and love that super crispy crust of this handvo.
Very delicious.. and great job done..
Very delicious pan Handvo ! I will try it your way…
this is how i make it too..looks lovely
I am always scared to try this one you have made it effortlessly so great.I know great people like u can do anything.Very nice recipe gayathri.
Second recipe with handvo Amazing, its already in my to do list
Look so delicious.
Never tried making handvo and your pictorial is going to be very helful when I do make it. Lovely clicks.
I’ve been seeing so many recipes for this – I want to make it soon . Your step by step photos make it look so much easier. Bookmarking this one!
Looks so yumm
Looks so good Gayathri, great efforts and your sbs always help..
bookmarkin this… yummy clicks !
Awesome step by step pics! Will have to try this out as it is too tempting!
Till recently I too made Handvo in a pan. Your recipe and the pictures are superb. It looks so crisp and soft. All that sesame seed make it even more delicious.
I just saw another version of this in Manjula’s blog. This looks great too.As you said there are so many variations to this dish!
yummy handvo.. Never tried it before..
This has been on my to do list for so long and even thought about trying it this marathon but could not. As usual your pictures are conveying how amazing the dish has turned out.
This was the recipe I wanted to try for the alphabet H, but never made it…Bookmarking your recipe 🙂
Wow you made it so perfet nice color on top great.
Though the 2nd handvo is taller and looks tastier, but I loved the first one’s click…And its special since yur mother also liked it, right?
Anyway, great choice of a bread!
Lovely pictorial Rajani…looks awesome
Love the process that you hav eshown. Awesome.